Summary: Intro | Linux VM Setup | VM Networking | Extending a Hadoop Cluster
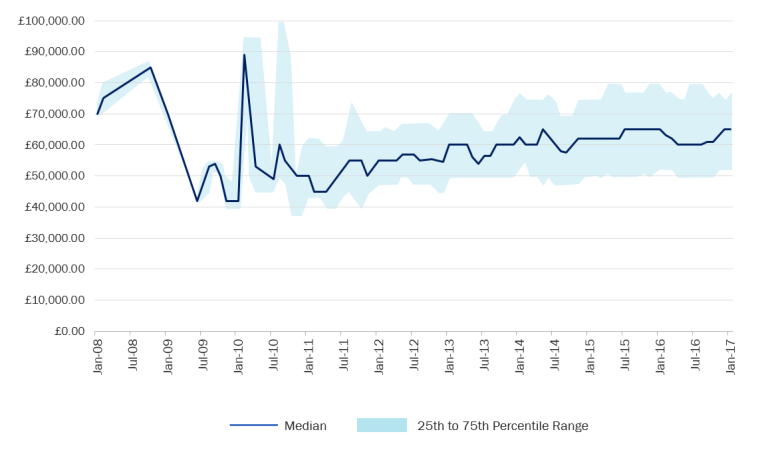
At times I wish I had started my journey with Big Data earlier so that I could enter the market in 2008-2009. Though Hadoopmania is still going strong in IT, these years were a gold era for Hadoop professionals. With any sort of Hadoop experience you could be considered for a £80,000 position. There was such shortage of Hadoop skills in the job market that even a complete beginner could land a wonderfully overpaid job. Today you can’t just wing it at the interview; the market has matured and there are many talented and qualified people pursuing careers in Big Data. That said, after years, the demand for Hadoop knowledge is still on the rise, making it a profitable career choice for the foreseeable future.
While these days there seem to be a separation between analyst and administrator/developer roles on the market, I am of opinion that either role has to be aware of the objectives of the other. That is: an analyst should understand the workings of a Hadoop cluster, just as a developer needs to understand the demand an analysis will put on the worker nodes. It’s very similar to a skilled Business Intelligence specialist that appreciates the impact a database design has on the speed of query processing and the availability of the system. That philosophy is the why behind this post: getting to know Hadoop by configuring a cluster yourself. You could be creating a cluster simply because you want to see how it’s done, or perhaps you are looking to extend the processing power of your system by an extra server.
Your first Hadoop cluster
Hadoop is a go-to technology for massive data processing because of its flexible scale-out model of data storage. The data is simply put on disk (as is) and then replicated across the nodes for increasing its availability for processing. Every time you process the data set, the function you define is spread across the nodes and each of the nodes involved gets a piece of the file(s) to speed up things by paralleling the processing task. Because there are no joins between the data set, neither is there any rigid, RDBMS-like, schema, the system can flexibly scale by adding nodes. That makes clustering one of the fundamental ideas behind Hadoop.
Clustering is a mix of networking, Linux command line, Hadoop tools, virtualisation, and some trial and error attempts. The cluster we’ll build will consist of two Virtual Machines: one from Cloudera (see the import steps in my previous post) and one Linux image. I have them on separate machines but you can run them on one laptop if you’ve got at least 8GB of RAM. The idea is to add the Linux image as a second data node to our cluster.
Generally speaking, this is a good exercise if you want to learn about Hadoop clustering, but you can also use this as a guide to extend your cluster with an extra processing node for your analysis. For these purposes use an old laptop and put a VM manager on it, or even install Linux directly on disk. If the following is used for studying purposes, I recommend you try to figure the problems on your own and only refer to the guide when you are really stuck. It sometimes takes hours to get something right, but when you do, you remember why it worked, what went wrong, and what to avoid in the future.
Step 1. Creating a Linux VM (CentOS)
First we need to get a Linux machine. In the previous post I covered importing a VM to VirtualBox – here you will see how to create one. It’s actually quite straightforward: the general formula is to download the .iso image of the Linux distribution of your choice, and import that disc to a previously created Linux container in the VM manager. There are various Linux distributions available for download. For your secondary node you can use any Linux machine supported by Cloudera Manager. I have chosen CentOS, which is a very similar operational system to RedHat that Cloudera uses in their VMs. RedHat does not support individual (i.e. non-enterprise) users, hence CentOS is the closest option.
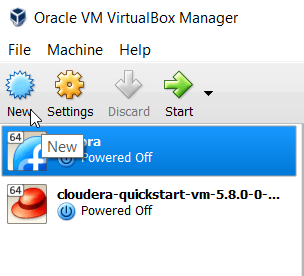
Go to CentOS website to download an image (DVD version is okay). While the image is downloading, open the VM manager (here: Virtual Box), and create a container for it.
Open the New wizard.
There will be a few configuration steps before a container is created. Specify a name for the new machine and select its type (Linux) and version (either Red Hat 64-bit or Linux 64). Give it some memory (accept the default 1GB), and tell the manager to create a virtual hard disk for the machine.
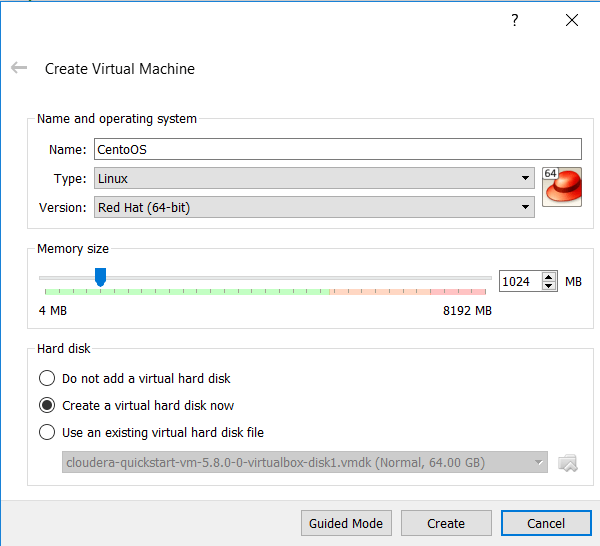
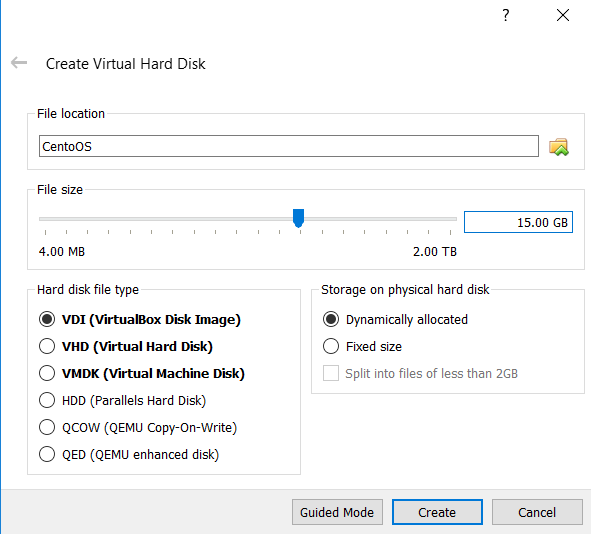
Overwrite the defaults for that disk and give it about 15 GB of space. Check for the storage to be dynamically allocated – that means the machine can grow freely over 15 GB as you keep using it – though for this exercise we shouldn’t need more than the originally specified storage.
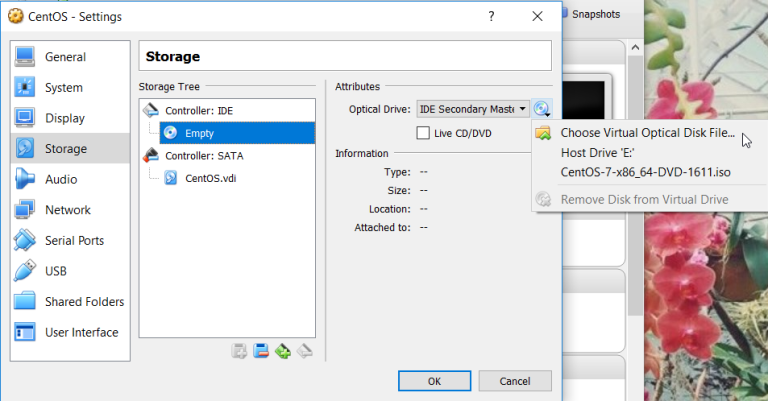
Once the container configuration is done and the CentOS image is downloaded, you can combine the two. Go to settings of the VM and navigate to Storage options. There, replace the IDE disk with the .iso file you’ve downloaded.
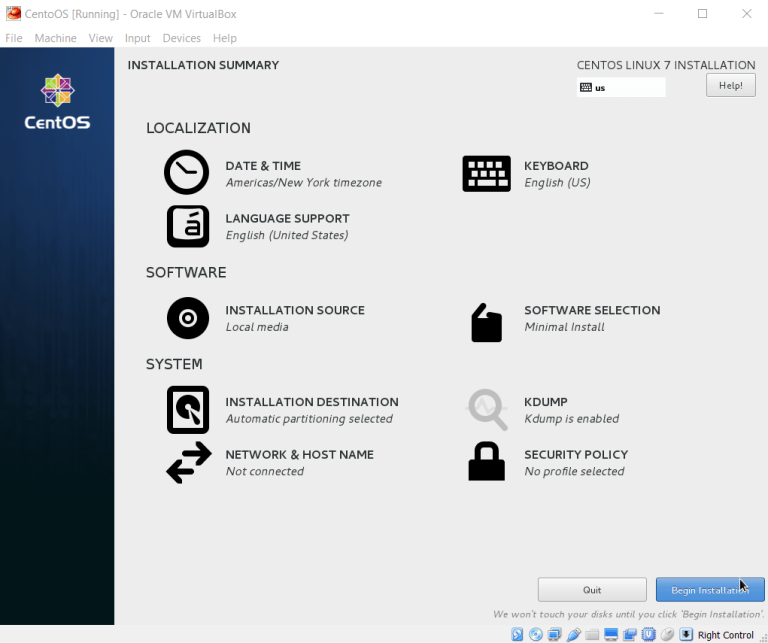
Confirm and start the VM. CentOS will now perform some installation tasks before you can start using the machine. You’ll be asked to select the OS language, confirm partitioning type (accept all defaults), and finally CentOS will prompt you to create Root password and a secondary user. Root is your administrator that can perform all changes on the system. Remember the password you choose for Root. I went with centos. I’ve also created a secondary user (centos).
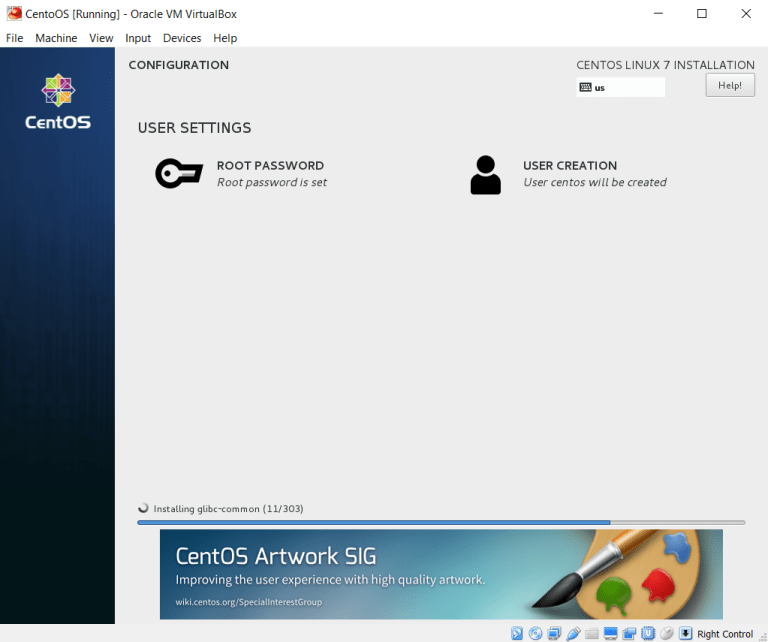
The installation will take some time and when it finishes, you’ll be asked to reboot the VM. The VM is now setup and we can proceed to the network configuration. There are a few extra configuration steps if you get annoyed by the tiny screen and also capturing the cursor by the VM. To fix this, you can see the next section of this guide to install guest additions onto the VM. There I also explain how to get a graphical interface on your CentOS instance which for some would be a preferable way of working with Linux. This is true especially if you aren’t used to command line interfaces.
Step 1.B Guest Additions & GUI (not required)
As mentioned above, Guest Additions are a set of tools provided by your VM manager for working with the VMs its hosting (hence guest). Guest Additions allow you to change the screen size or use the same cursor between the host machine and the VM. Although these sound like nuances, the work comfort increases noticeably once you get Guest Additions set up.
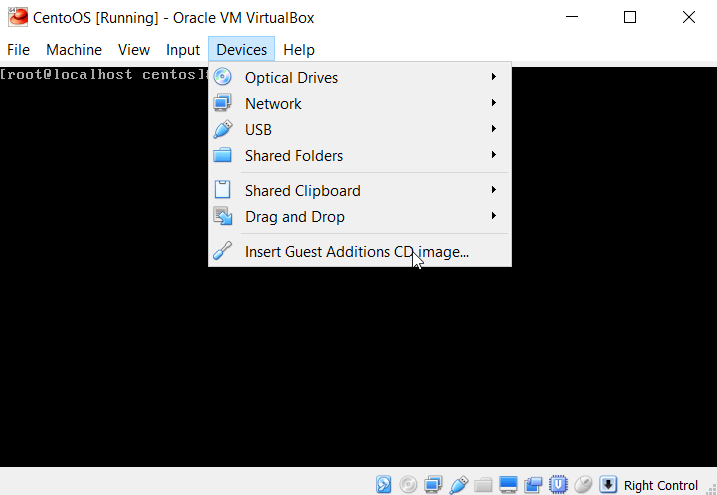
Start up CentOS, and log in as root. From the VM menu select Devices, and click on Insert Guest Additions CD image menu item.
The virtual CD is now accessible from the VM (you can check this under Settings > Storage of your VM). If everything went fine, the following command will output a file with “VBOXADDITIONS_” in its name.:
file -s /dev/sr0
With the following set of commands you’ll create a mount folder to move the Guest Additions setup files onto the system.
mkdir -p /mnt/vboxadd
mount /dev/sr0 /mnt/vboxadd
Before you install the additions, there are a couple required packages to install. Yum is the package manager on CentOS. If after running a yum command you get an error (e.g. repository base couldn’t be found), it could be that the network adapter wasn’t configured. You can fix it by running the following command:
dhclient
Which, in short, configures your network using dynamic IP address. The packages you need to get installed beforehand:
yum install gcc bzip2
yum install 'epel*'
Then check the version of the Linux kernel you’re running:
uname -r
Use the version number to install the kernel headers package:
yum install kernel-devel-<version>
In my case, this was:
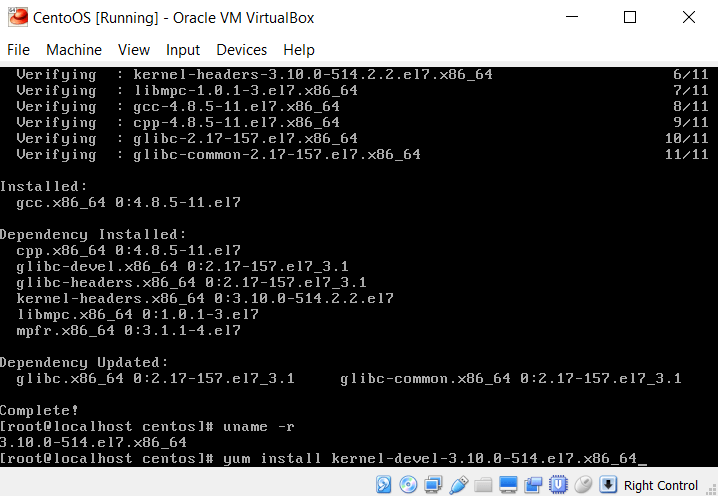
The last command tells yum to updated all installed packages:
yum update
Finally, you can install the Guest Additions. The installation file resides in the folder you’ve previously mounted. Run it with the following:
/mnt/vboxadd/VBoxLinuxAddtions.run
After the installer finishes, reboot the machine. If the desktop does not resize try rebooting again.
If you prefer to use a graphical interface with your Linux installation, follow the steps below. It is not required to complete the exercise, but useful if you prefer GUI to a command line.
yum -y groups install "GNOME Desktop"
startx
The first command install the GUI, and the second starts it.
Step 2. Network Configuration
The most tricky bit of this exercise is to set the networking between the machines correctly. This guide covers the scenario of running the Virtual Machines on physically separate servers, but if you decide to keep them on a single machine (for learning purposes), the setup is essentially the same.
By default, Cloudera activates a NAT adapter for each VM so that it can connect to the internet. Change this to a Bridged Adapter so that we can establish a connection in the internal network.
Start the machine.
Go to the properties of your Linux VM. Here as well, the default adapter is NAT. Change this to a Bridged one. Save your changes and boot the VM.
LINUX VM
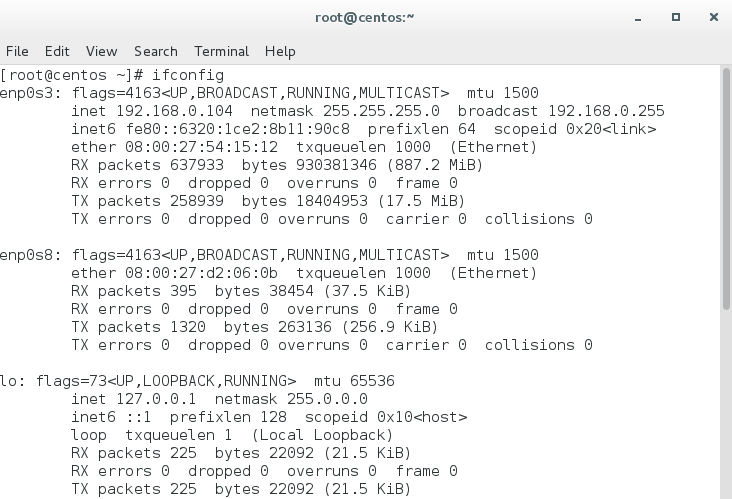
You can either use the command line interface or Gnome GUI (with startx). Login as root. Check the current network setup with:
ifconfig
If the command doesn’t work, use instead:
ip addr
Locate the enp0s3 adapter – this is how this machine is known on the network – and write down its IP address.
My VM didn’t get the network connection up straightaway. If that happens to you, here are some commands that might help:
service network restart
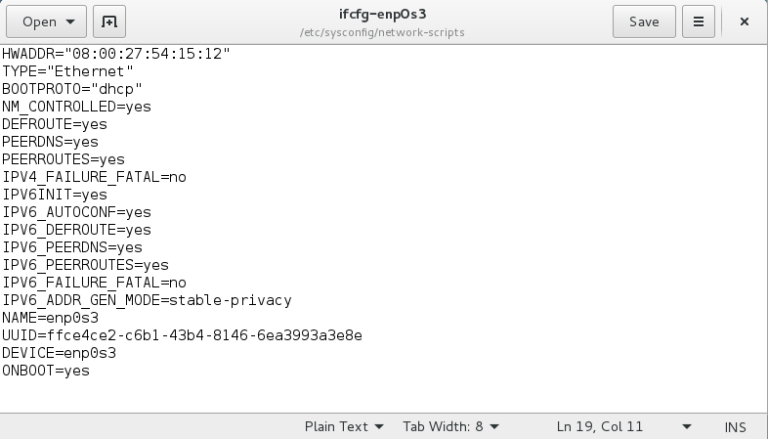
If that doesn’t get the network up, you might need to modify the configuration file of the network adapter. Before you modify the file, create a copy of it, or note what you’ve changed.
gedit /etc/sysconfig/network-scripts/ifcfg-enp0s3
In my case, the I’ve added the MAC address of the adapter and specified that I want the Network Manager to manage ifcfg-enp0s3. Save the file, and restart the network. This should do the trick.
In a real environment, i.e. where you work with an actual cluster, it is recommended to set a static IP addresses for all machines involved. You don’t want to update the settings on all your machines every time something in the network changes. For the purposes of this exercise a dynamically allocate IP is good enough.
Once you confirmed the network adapter is up, go to the Cloudera VM.
CLOUDERA VM
Cloudera VM requires just minimal setup. First, we need to check if Cloudera VM can see my CentOS VM. Once a Cloudera QuickStart VM launches, it greets you with the following screen:
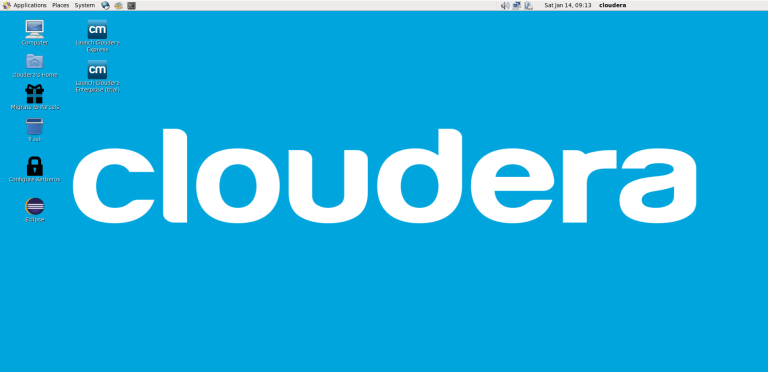
Right-click on the screen and select to start Terminal. In the Terminal, type:
ifconfig
This will output your network settings. You’ll see something like this:
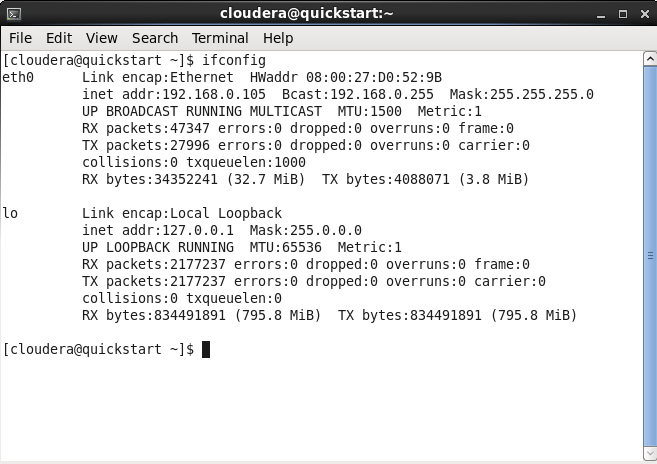
Note the address of the Bridged adapter eth1. You can confirm it by checking the associated MAC address in the settings of the VM.
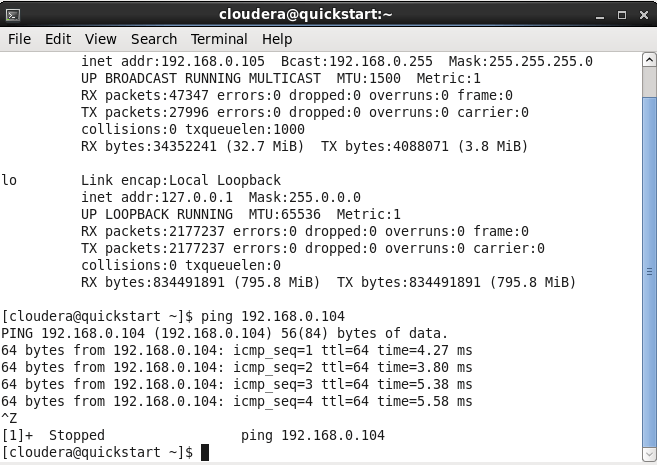
Still in the Terminal, see if the VMs can see each other. Ping the address of the Linux VM using the IP address of ifcfg-enp0s3 adapter from the CentOS machine:
ping <IP_ADDRESS>
In my case:
ping 192.168.56.104
If the network setup was correct, you should see a confirmation that the machine was able to send and receive data from the other VM. If you get a “Request Time-Out” message, double check the network configuration. In case you’re behind a proxy there are couple other things you need to specify.
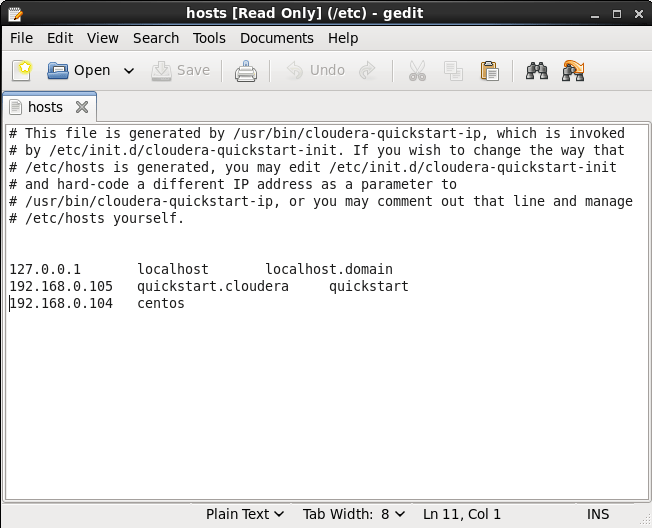
Rather than remembering the IP address of the node, we’ll give it a name. This is generally a good practice when setting up a network: it’s better to refer to a node alias rather than its IP address, because the latter is more likely to change. It is also a naming convention required by Cloudera Manager. You can specify the node name under /etc/hosts file of the primary machine. Type the following in the terminal:
sudo gedit /etc/hosts
Where sudo gives you admin priviledges to modify the file, gedit is the file editor in Linux, and /etc/hosts is the file storing host names.
The hosts file will be displayed. Add the address of the secondary node to the file and associate it with a name (e.g. “centos”). Save the file.
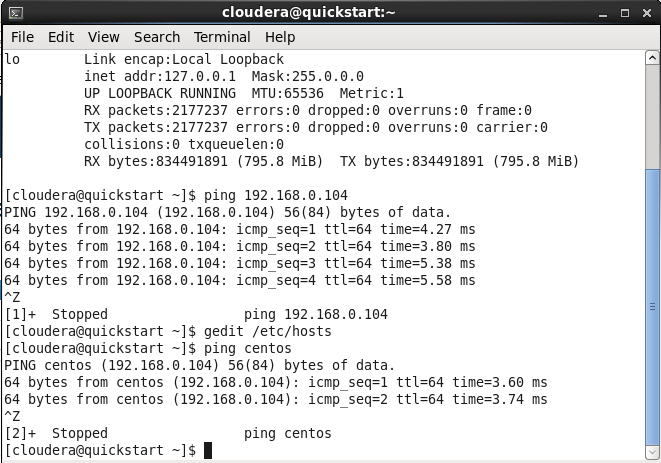
Check if the change was successful by running a ping using the alias you’ve chosen. If the ping was successful, we’re good to go.
Step 3. Adding a node to the cluster
Once the Linux node is ready, adding a node to the Hadoop cluster is relatively simple with Cloudera Manager: provided the network setup is correct and the node we want to add is up. If your setup is on a single physical machine – and if your laptop can handle it – I recommend allocating more memory to the Cloudera VM as it will be using a resource intensive Cloudera Manager to handle the installation.
CLOUDERA VM
Open Firefox and navigate to From the Hosts tab select Add new host button. This will open up an installation wizard. Type the name of your Linux node in the wizard, and select Search. If the networking is correctly configured, CM will be able to find the node. Select the node and click to proceed.

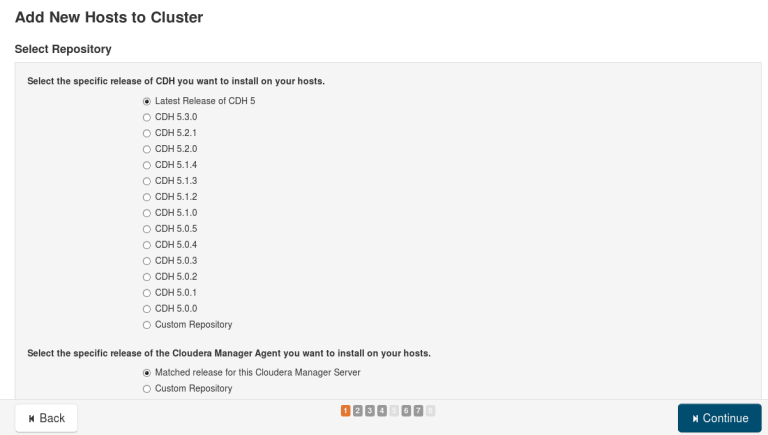
Select the latest release of CDH (Cloudera’s Distribution of Apache Hadoop) and click Continue.
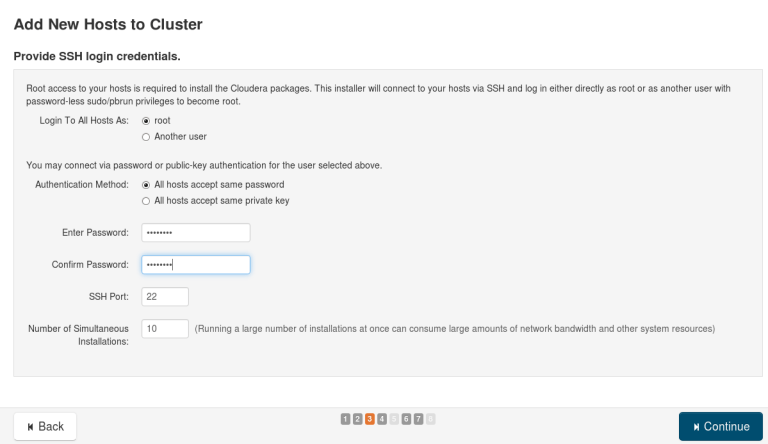
Provide the Cloudera’s VM password when asked (centos).
On pressing Continue the installation of CDH get installed on the second VM. You can monitor the network load from the Task Manager on your own laptop. The installation should take about 30 minutes. When the installation is complete, you can select the processes that the new node will host. For now I’ve skipped that part, but you can add the Data Node process and any other tool you want to try out already at this point.
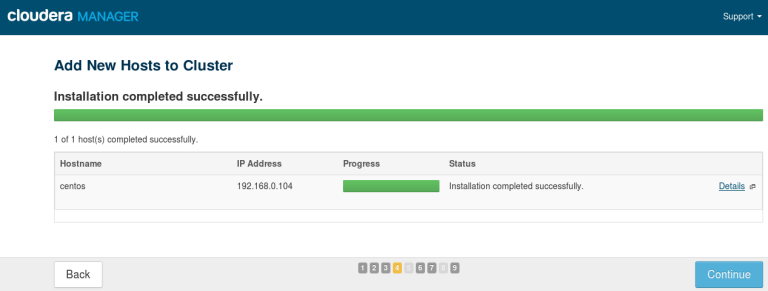
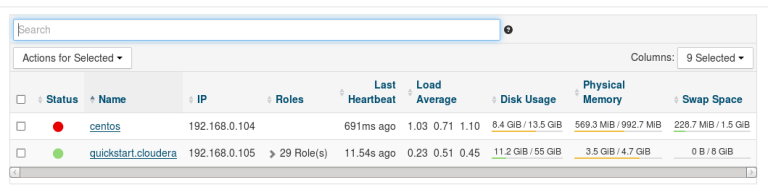
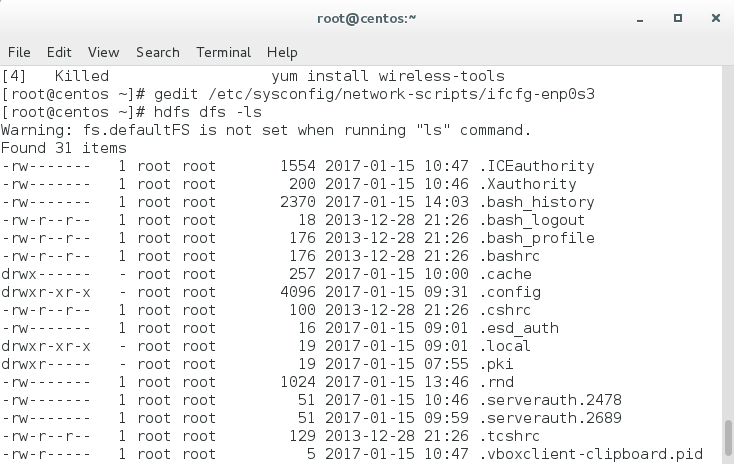
My installation has been successful, and my Linux machine is now listed as the second node in the cluster. You can verify that Hadoop now resides on the CentOS node by querying its directory there.
LINUX VM
Review the installation by typing in the terminal:
hdfs dfs -ls
This will list the Hadoop directory structure that was installed on the node. You’ve successfully configured your first Hadoop cluster!
Post Scriptum
One book to get started with? Read chapters 1-3 from Tom White’s Hadoop. The Definite Guide (O’Reilly). It’s an incredibly comprehensive guide to understanding the inner workings of Hadoop.
Follow @EveTheAnalyst